Always trust your instincts. That's what mothers tell us.
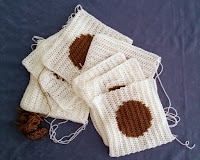
Will I have enough yarn in the stash to make nine white squares with tan circles in the middle?
When I first began to crochet many years ago, one of my aims was to, one day, have a yarn stash that could cater for all sorts of projects. It would have a variety of yarn weights, fibres and colours from which to choose without the need to dash down to the shops every time I wanted to commence a project.
It is pleasing that, in this instance, I can do just that which is lucky. Stash-diving is the rule in my home these days because the current stash of yarn is threatening to take over!
But will I have enough?
To find out, I began making squares.
Intarsia method
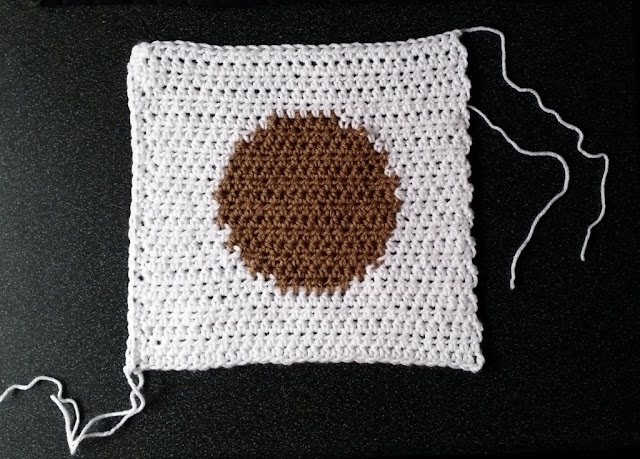
The squares are made in rows, using intarsia colour changing techniques to create the tan circle in the middle. Intarsia is a technique that borrows its name from the inlaid woodwork technique used in marquetry. Intarsia is different to other crocheted colourwork techniques; e.g. tapestry crochet or fair isle; instead of carrying the unused colour right along a row, the coloured thread is only used for its own colour section. | |
| Front (right side) of intarsia square. A double crochet (Aus/UK) row is worked into the row ends on the left hand side. |
In the square above, white yarn (skein A) is used for the beginning rows until it is time to change to tan. At the end of the tan stitches on the row, a new ball of white yarn (skein B) is joined into the row, leaving the tan yarn to rest behind the work (on the wrong side (WS) assuming that the right side (RS) is facing you).
At the end of the row, turn and work the next row until the tan is needed again. Lift the tan yarn from the row below to join it into the current row, while leaving the white yarn (from skein B) on the wrong side. At the end of the tan section, rejoin the remaining white yarn (skein A) by lifting it from the previous row; and so on.
Make sure that the unused colour strands rest on the wrong side of the work. It can be helpful to put some sort of marker on your square to indicate the right side to help you remember the RS/WS.
 |
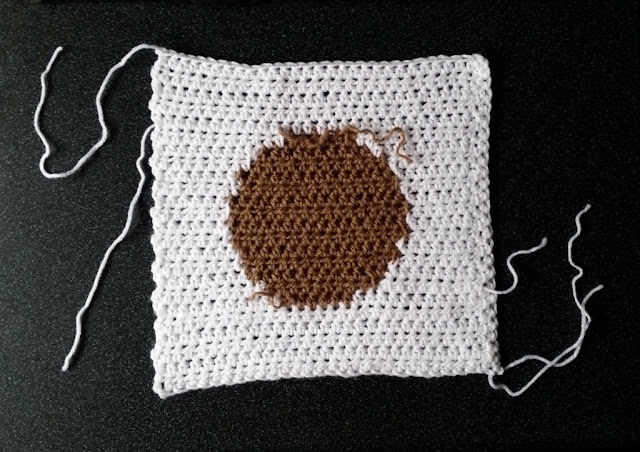
| Reverse side (wrong side) of the same intarsia square. The double crochet (Aus/UK) row can now be seen on the right hand side. Which edge do you prefer? |
Calculating yarn amounts
I calculated the yarn amounts by weighing the skeins. I can work out how many metres (m) per gram (g) by looking at the ball band. Metres will also be the most useful measurement for knowing how much yarn to use for the same project next time.Different yarns have different weights (not to be confused by yarn categories like 8 ply/DK, 10 ply/Aran, Chunky, Fine etc.). In this project, each yarn is rated as 8 ply (DK) and comes in 100 g skeins but some have 283 m and others have 310 m per skein even though they all weigh the same 100 grams each. This shows that some skeins of yarn give you more length and can go further than others. This is critical information when making stashbusting decisions to save heartache before you start (says Jodie now, after the fact!).
Please do not be offended if I stick to the very basic principles. When I was a brand new crocheter, it helped to know each tiny step, so I hope to help others by keeping it simple. It may look like a lot of numbers at first glance but that's because I have provided a number of examples and not assumed any prior knowledge.
To find metres by weight
If there are 310 m / 100 g (information on ball band), divide the length by the weight:
310 m ÷ 100 g = 3.1 metres for every gram
If there are 283 m / 100 g (information on ball band), divide the length by the weight:
283 m ÷ 100 g = 2.83 metres for every gram
Calculations for Each Square
How many grams get used up as I crochet each square?
Begin by weighing the yarn before starting the project in grams (Start_weight).
After each square, weigh each skein in grams (Finish_weight).
(I have used grams as an example but you can use ounces or any other weight measurement as long as you use the same measuring system throughout.)
Start_weight − Finish_weight = Weight_used
From that measurement, using the ball band information, I can calculate the metres used (or needed) to work each section:
How many metres were used in the crocheted square?
For one crocheted square, I worked with one skein of tan (TanSkein), and two skeins of white (WhiteSkein1 & WhiteSkein2).
Use the formula above to find out how much yarn was used by weight (grams):
For TanSkein:
- Start_weight = 16 g
- Finish_weight = 9 g
- Weight_used = 7 g
For WhiteSkein1:
- Start_weight = 63 g
- Finish_weight = 54 g
- Weight_used = 9 g
For WhiteSkein2:
- Start_weight = 100 g
- Finish_weight = 93 g
- Weight_used = 7 g
Next, to find out how many metres were used, multiply the Weight_used by the 'number of metres per gram' amount calculated from the information on the ball band. (Refer to the section above "To find metres by weight" to get the metres/1 gram):
- TanSkein: 7 g × 3.1 m = 21.7 m used for 1 square
- WhiteSkein1: 9 g × 2.83 m = 25.47 m used for 1 square
- WhiteSkein2: 7 g × 2.83 m = 19.81 m used for 1 square
- 21.7 metres of tan yarn.
- 25.47 m + 19.81 m = 45.28 m of white yarn.
This is all good to know if one needs to buy more yarn or find a substitute. Buy yarn supplies by metres instead of grams. Also, I like to round up to the next full metre because the numbers calculated describe how much yarn we need at least.
When the results are rounded, each crocheted square will need at least 22 metres of tan and 46 metres of white.
Calculations for the Entire Blanket
Multiply these figures for each square by the number of desired crocheted squares:
- e.g. 9 squares in the blanket:
- 9 × 22 = 198 metres of tan
- 9 × 46 = 414 metres of white
How many skeins will I need to buy or have for 9 crocheted squares?
I use the metres/grams information on the ball band again but 'in reverse' to find out how many grams of a yarn I need to get the right length in metres.
To find weight by metres
This time, to find out how much 1 metre of yarn weighs, divide the weight of the skein by the length of the skein:
100 g ÷ 310 m = 0.323 grams for every metre
100 g ÷ 283 m = 0.353 grams for every metre
I round off to 3 decimal places while doing calculations.
Multiply this result by the number of metres of yarn needed for the project; i.e., 198 m of tan and 414 metres of white.
If 1 metre of tan yarn weighs 0.323 grams, then 198 metres of tan yarn will weigh:
198 m × 0.323 g = 63.954 g
At least (or a minimum of) 64 grams of tan yarn will be needed for 9 crocheted squares.
If it is sold in 100 g skeins, 1 skein will need to be purchased
(because 64 grams is less than 100 grams).
If 1 metre of white yarn weighs 0.353 grams, then 414 metres of white yarn will weigh:
414 m × 0.353 g = 146.142 g
A minimum of 147 grams of white yarn will be needed for 9 crocheted squares.
If it is sold in 100 g skeins, 2 skeins will need to be purchased
(because 147 grams is more than 100 g but less than 200 g).
Of course, if you are 'stash-diving' you can just weigh what you've got to see if you have enough.
 |
| Seven squares so far. Two more to go. Please, yarn, stretch the distance for me! Who will win this game of 'Chicken' – me or the yarn? |
Sadly, (yes, sadly), I am quite pedantic about calculations. I know that my tension can vary from one square to the next and one crochet session to the next, so I stopped and measured for at least 4 crocheted squares to get some averages, just to be on the safe side.
The total yarn amounts were very close for each square but enough of a difference that I may or may not have enough yarn. I will either have just enough or not quite enough! I can hear my friends who prefer 'guesstimating' and 'fudging' imploring, "What was the point of all that maths? Was it really worth the effort? All that crochet time used for maths, and for what?"
Inconclusive results are such a torment!
My own conclusion, using the 'very scientific method' (!) of 'gut instinct', was this likely scenario:
- I can either add side edges with white (for a neater finish) and risk running out of white and needing at least 1 yellow square; or
- Don't bother with side edges and be very likely to have just enough white for 9 squares (but not guaranteed) and not-as-tidy colour joins.
What should I do?
More decisions!
In the end, I took the risk.
I voted for neater edges versus all white squares,
knowing that I have some lemon yarn waiting in the wings.
In the end, I took the risk.
I voted for neater edges versus all white squares,
knowing that I have some lemon yarn waiting in the wings.
What would you do in this situation?
Do you agree with my decision?
Related Posts on Lupey Loops
"Stashbusting to a Deadline", 21 February 2017: http://lupeyloops.blogspot.com.au/2017/02/stashbusting-to-deadline.html
"A Touch of Tricot", 13 February 2017: https://lupeyloops.blogspot.com.au/2017/02/a-touch-of-tricot.html
Sadly when I play chicken I just go with the gut. I didn't know it was possible to work it all out mathematically. I am going to go back and have another read for future use.
ReplyDeleteNothing wrong with the gut for an experienced crafter, Lorraine! I hope my post makes sense and is useful for you.
Deletewonderful math tutorial. When I play yarn chicken I do something similar - weighing the ball before and after a row to see if I will make it through to the end. I usually win....but sometimes......well, you know.
ReplyDeleteYep, I know! ;-)
DeleteIn this case I was also measuring my tension regularly for accuracy and to keep my squares 'square'. The intarsia presents the potential for a change in tension where the colours and yarn change over but I think I did alright.
Thank you for the feedback about the maths tutorial. It means a lot to me. I was worried about scaring people with lines of numbers and yet, for those who want this information, the detail is needed.
You are well beyond me in the math skill department. I am a run with my gut ind of gal, often not making it to the finish. See my last blanket to see how close I cut it to the finish line. I love your thoughts and I love the blanket. Good luck.
ReplyDeleteIt's just practice, Meredith. It didn't occur to me for a long time as a newbie that I could work out the amounts using the information on the ball band. I thought it would be good to show how I use these principles in practice in the context of a real life scenario.
DeleteThe main information is in the formulae highlighted in coloured text. The rest of the post is explaining how to apply them.
If your gut feeling is usually right, you probably have an innate sense for lengths and weights (both mathematical principles) without 'intellectualising' them.
It is often fun to just run with gut instincts...sometimes you need to live dangerously! hehehe
This was interesting and useful info. I knew math would come in useful one day :-)
ReplyDeleteAmalia
xo
Haha! You made me laugh, Amalia. :-)
DeleteIf only I could convince my children that maths is useful!
("Do your maths homework!" is a regular refrain in my house.)